Converting a TJ To 1 ton, or 3/4 Ton, or maybe 1/2 Ton Chevy Steering
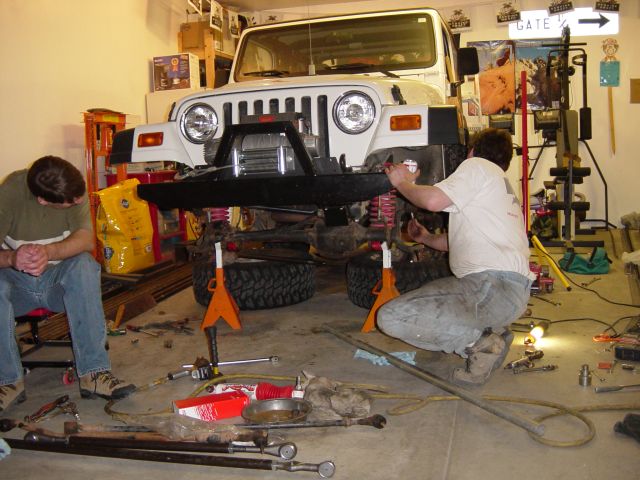
I set out to fix the problem I have had on my TJ, eating Tie Rods and Drag links. The Golden crack has caused the tragic end to a number of Drag links and caused our group to Engineer some very interesting trail fixes so we could get home. The tie-rod on a TJ is just way to low, It sticks down really low like the snow plow on a plowing truck. Thus I have seen many of these bend. I have bent mine 4 times. I started with a stock one, then a Currie heavy duty one, then I sleeved the Currie bar with some DOM tubing.
Plus the Stock Steering setup is the famous Inverted Y steering setup. This means that the drag link goes to the passenger wheel. The tie rod connects to the Drag about 12 inches from the passenger wheel where the Drag link is bent. Why is this bad? It causes the Steering to tow in and out as the body of the Jeep bounces up and down. This is what some people refer to bump steer. Meaning as you hit bumps the Jeep steers on its own until it settles down.
So I set out to fix these problems. In doing so I found a number of other issues to deal with. I will explain them here.
Tie-Rod Details:
To fix the bump Steer I wanted a strong bar from one Wheel to the other. This I accomplished with a piece of 1.25 DOM tube with a .281 side wall that is 43.5 inches long. I am hoping that this will be strong enough. From all the research I have done this is the tube of choice.
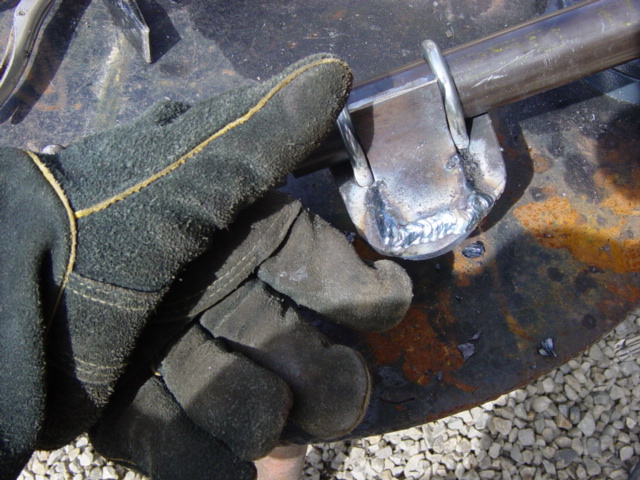
In the process I wanted to raise the bar up and away from the rocks. To do this I flipped over the tie-rod end and places them on top of the Steering knuckles. Using the bigger tie-rod ends required the knuckles to be reamed out anyway so turning them over was not an issue.
Tie-Rod End Details:
I also wanted the parts to be bigger and stronger than the stock stuff. For this task I found 1 ton, 3/4 ton, or 1/2 Chevy tie-rod ends. The parts are listed below. the reason I say they are 1 ton, 3/4 ton, or 1/2 ton is because these part are listed on a 1/2 blazer, and a 3/4 ton blazer, and a couple of them are listed on a 1 ton Blazer. So after being told this was not a 1 ton setup, I won't claim it is. You are welcome to get these part numbers look them up use them for reference or find some that are 1 ton. With the use of these Chevy ends I can connect the drag link to the passenger side tie-rod end and make it shorter than the original.
I also found out that the hole in the tie rod end is for a steering stabilizer and not meant for a drag link. There are parts available that are meant for a drag link and using them may be a better option. I all I can really say is this setup is way stronger and better than my stock Jeep TJ steering and I have had really good success with it.
Drag Link Details:
The Drag link is also made out of the same 1.25 DOM .281 wall. I cut the length of 21.5 inches and had them threaded at a machine shop to the Chevy Ends. The threads needed are 7/8 inch ultra fine 18 threads per inch. This is a special thread and its not easy to find a tap or jam nut for this application. This is the same threads that are needed on the Tie-rod.
Steering Stabilizer Details:
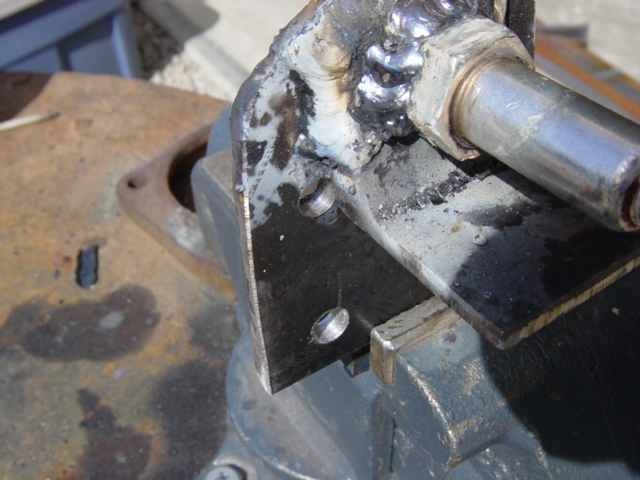
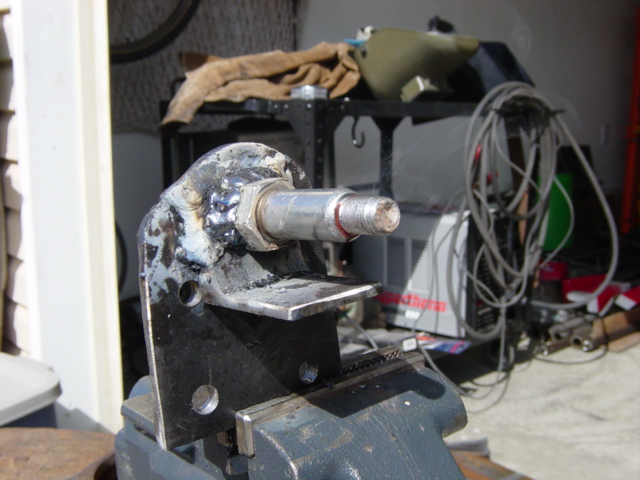
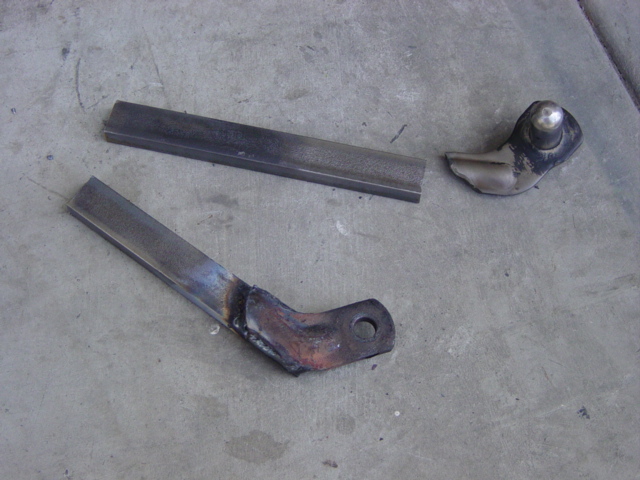
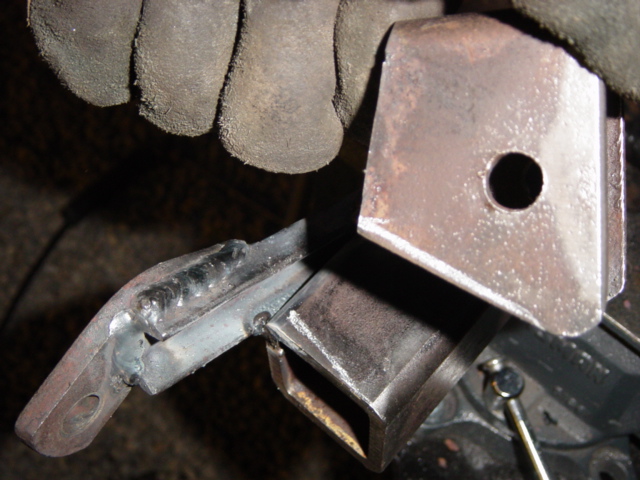
The Steering shock mount is in the way of full steering turning radius because the Tie-rod was moved way up above the original location. So I cut this box off and tossed it in a molten pile of Plasma Cutter Slag. (Plasma Cutter are really cool, and should be a part of every shop). I do want to run a steering shock, so I made a new box style mount and moved it back in over the axle just a little bit farther so the new tie-rod would clear.
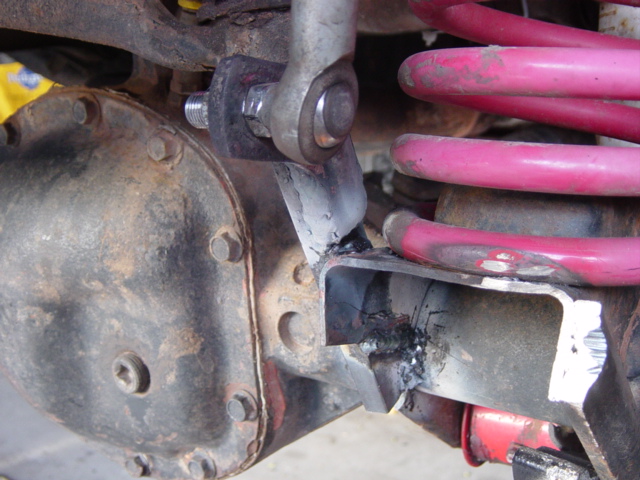
Sway Bar Connection Details:
The sway bar connection point were also victims of the fast and furious Plasma cutter. They are also in the way of the newly position tie-rod. All was not lost. I figured a way to move them up and inside a bit and was able to remount them using a piece of C box angle iron 1 inch by 1/5 an inch. I am hoping this will be strong enough as the angle of the welding is pretty straight. See the final pictures when I get the site further updated. As an update after 3 years, this bar is not really strong enough, I have bent these both a bit in the years of wheeling without disconnecting my sway bars.
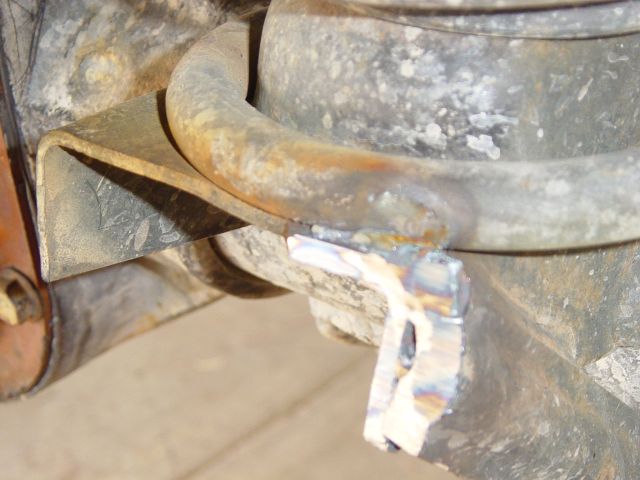
Here is a picture of what I had to cut off the drivers side. I cut the sway bar mount away.
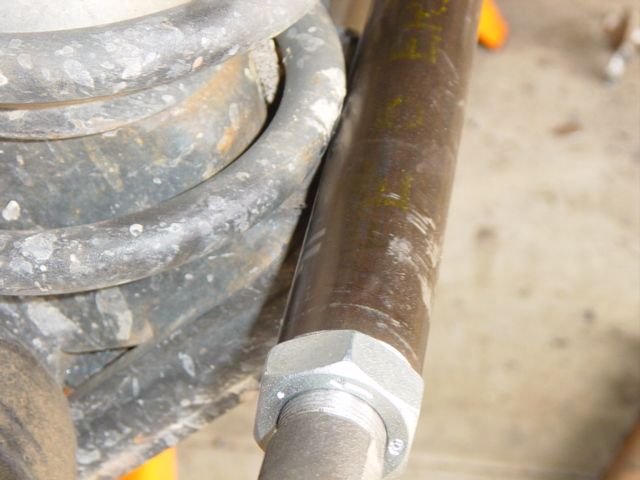
This shows how the tie-rod bar will hit the spring at full turn.
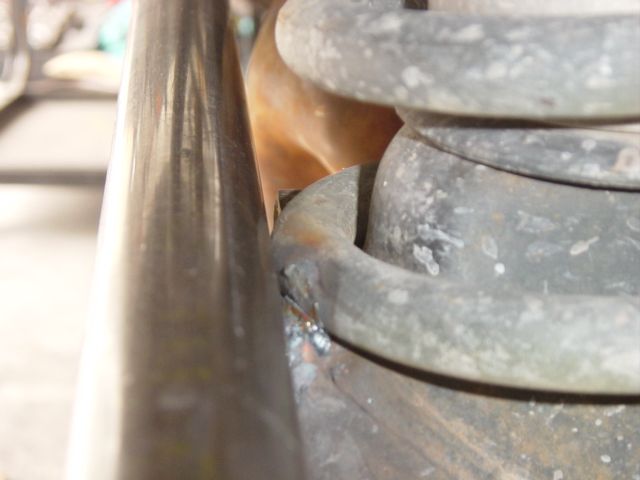
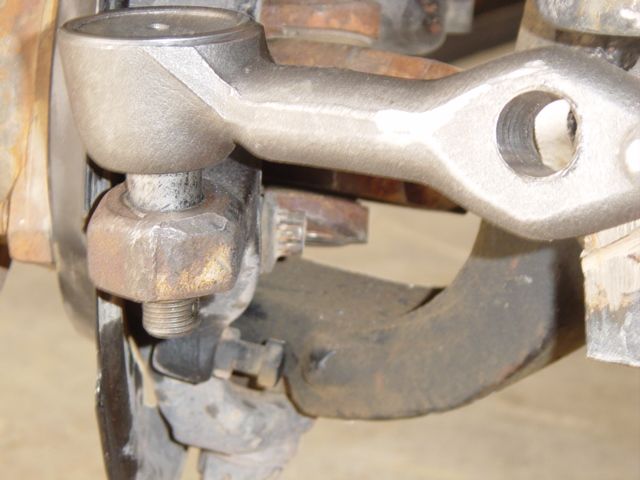
This will show the max steering when turning, notice it is less than the normal. Look at the out of focus Stopper bolt under the tip of the tie-rod end bolt.
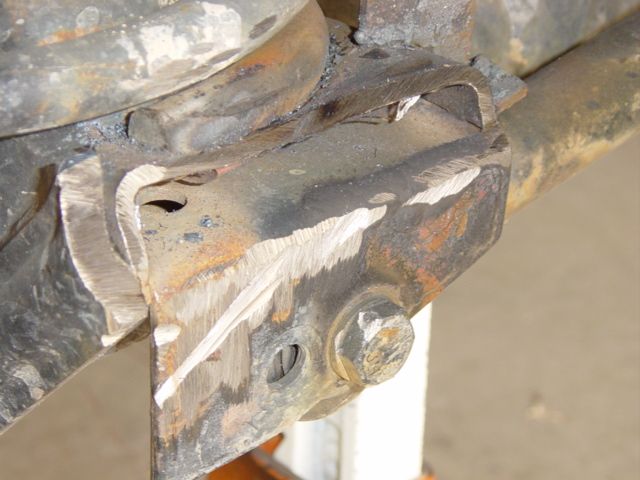
This shows what got cut off the passenger side. The mount for the Steering shock is partially left. It was later completely removed.
This shows the bar hitting the spring at full steering.
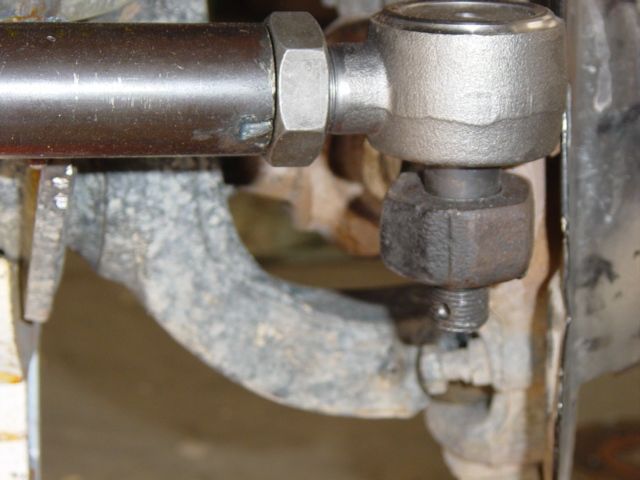
This shows max steering. Here the stopper bolt is easily visible on the underside of the axle housing. This also shows the tie-rod end and how the Drag link will attach to the the Tie-rod end. This tie rod end had to be reamed out to accommodate the new ends. When it was reamed it was reamed reverse of how it came from the factory, or the way Chevy had designed it.
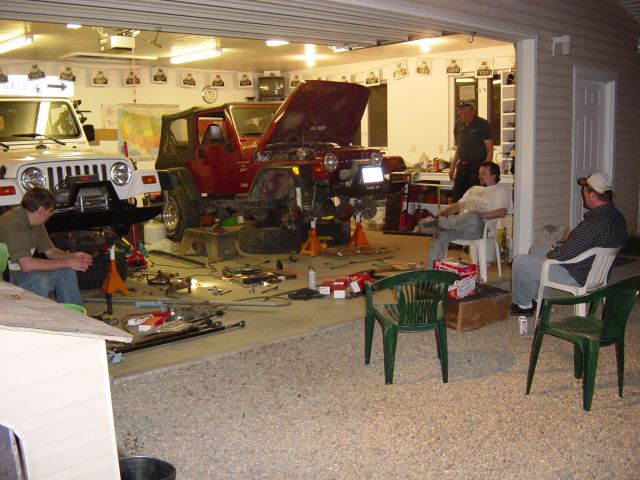
Here you can see we are clearly ready for a trip to Moab. Both Jeep are packed and on the trailer. The Dogs are in the back panting and ready to go. p.s. Don't stare at that light for very long.
No problem at all we are headed to Moab in 2 days. This is a controlled situation. Here you can see John has enough time to Practice a very difficult clogging step for his upcoming "River Dance" audition.
Well at least all the those tools that I get in trouble for buying aren't collecting dust in a tool box they are collecting dust right there in the middle of the shop floor.
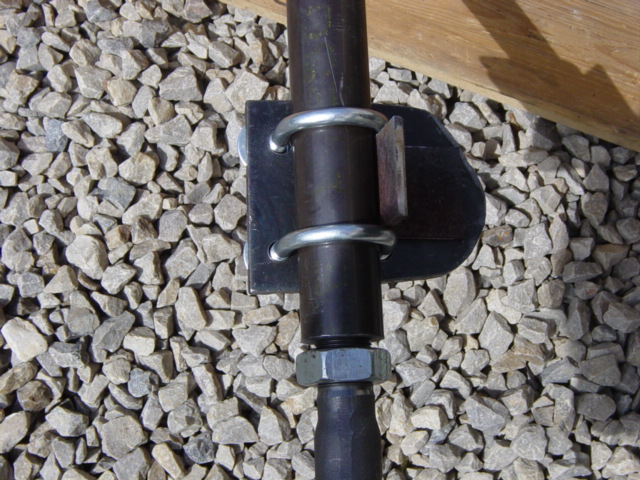
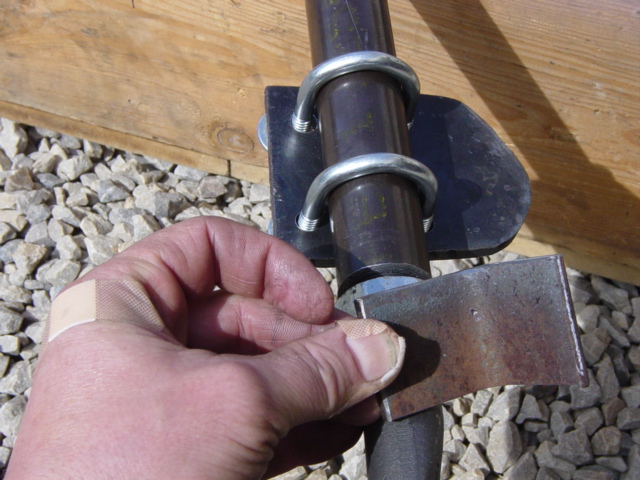
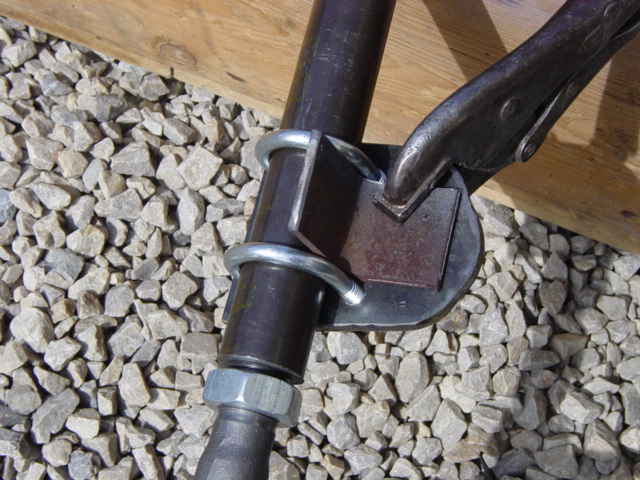
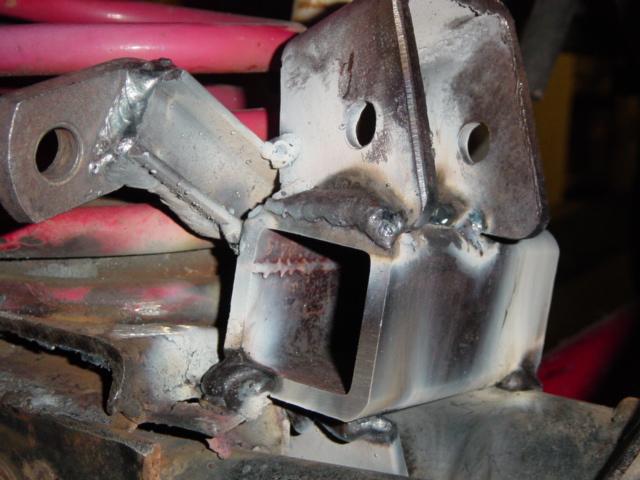
This is the mount I made for the connection of the Steering Shock to the new Drag link bar. I used 2 U bolt clamps and a flat piece of 1/4 inch plate cut in a circle shape. I then cut a piece of angle iron to weld next to the bar. This will help the mount stay in place. It won't be tempted to wobble and wear out.
As you can see in this picture. No good job gets done without a few Band-Aids.
As you can see here "Vanna White is showing off the fancy welds.
Here is the stud that will hold the small end of the steering shock. As you can see shock mount added to the bracket. I took the taped mount and I tapered the hole, and then I put the taper bolt/stud in tightened the bolt and welded it. This is a case of "That baby ain't coming out. I have a Welder and I'm not afraid to use it to create some big glob welds.
The cool part of this photo is the nice new Welding cart I just built to hold the welder and cutter.
This is the first picture of how I put the Sway bar mount back together. I welded them to a piece of 1 x .5 inch C bar about 1/8 inch thick.
Here you can see the sway bar mount welded to the opposite side of the Spring plate. To do this I had to move/turn the connection over and put it on the other side of the mount. I think this will work ok, I run the chance of it hitting the track bar mount, but I think I have enough clearance.
UPDATE: 2-20-2004. This was the most problematic part of this whole job. Now it has been 2 years, this mount is bent a little bit and this mount does rub just a bit. There are 2 reasons for this. This jeep has a lower lift than the other one I did. This jeep has about a 3 inch lift now, and the springs are sagging. Thus there is not as much clearance. This Jeep also has a Currie Anit-Rock sway bar, which puts too much pressure on this mount, so we will need to beef it up some how. The other Jeep I did had Quick Disconnects and a 4 inch lift so it has more room and the sway bar doesn't put any pressure on this on the road.
UPDATE: 2-20-2004. All the welds are holding strong.
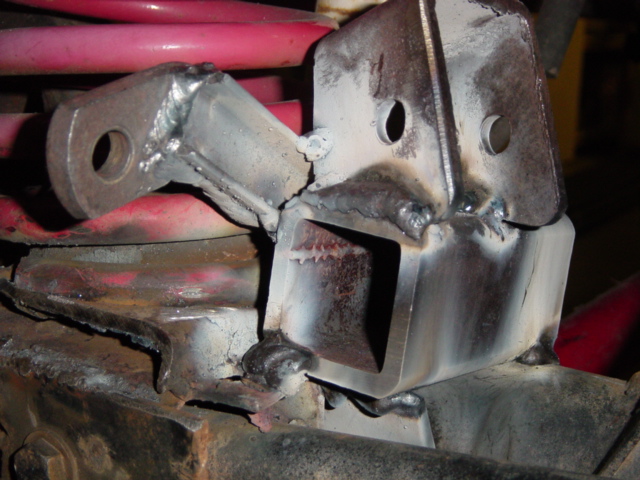
This shows the mount system I built for the passenger side of the Jeep. On the left edge is the sway bar mount welded to the 2 x 2 box iron. On top is the mount for the Steering Shock.
This is a close up of the design of the Shock mount.
This shows the box, sway bar and the shock mount welded into the Jeep. I set it on the axle tube, welded it behind, on top, bottom, and even braced it on the front with another plate under side.
UPDATE: 2-20-2004.
Conclusion: This setup works GREAT!! man all the bump steer is gone, the Jeep turns really tight and all is still well. 2 years of trails and road use and the system is working fine.
I got some questions, so I thought I would answer them here.
Question:
Great article on the steering mod. I to am looking to beef up the steering in my TJ. What I'd like to know is. How did this setup work? Did honing out he ends
weaken the area? Have you had any issues since it was done?
Answer:
The setup works great. I have been very happy with it and it has proven to be very strong and reliable. If the Honing of the tie rod ends weakened them they I have not had any problems. They are have still strong enough to hold up.
Question:
I have started a similar mod, but ran into the issue with the DL. I like the idea of using the chevy tie rod end to attach the DL. Due to some of your pictures, I was
concerned with the turning radius. Did you loose any?
Answer:
I did loose some turning radius, as I proved with the pictures showing the stop bolts not meeting the end. BUT this is not at all noticeable. The jeep turns better than ever. This maybe because any loss from bump steering or articulation has been removed. TJ are so small and turn tight circles anyway, this tiny lose was not a concern.
Question:
I was originally going for a knuckle over drag link. What are your thoughts to this kind of setup?
Answer:
I don't really know either way. I just went with the Chevy knuckle and it was designed to have the Drag line mount at 90 degrees to the tie rod end.
Thanks for the questions I hope I was able to help.
Parts list:
Autozone Online Prices for the Rod ends.
I was told that MOOG parts were better to get, but I went with Autozone because of the warranty and locality to my house.
NOTE: These may be 1 ton parts they maybe 3/4 ton parts I'm not 100 percent sure what the true definition is. Check these part numbers if you want to guarantee to have 1 ton parts.
ES2233L $25.99 (drag links) (note: These price have gone up a bit in the past years)
ES2234R $24.99
ES2027L $24.99 (tie rod ends)
ES2026R $24.99
Total $100.96
Taper Reamer Info
Here's the p/n info:
Afco $120 p/n 80770
Stock Car Products $80 p/n R8201
Goodson $50 p/n TR-216-2
Snap On $37 p/n R121 SnapOn Online
Note: I bought the Snapon Reamer. It was not a good tool, I used it to just barley get my knuckles reamed out. Then I took the rest of the parts off and took them to a machine shop and paid to get this parts reamed.
For the 7/8-18 taps I also used a machine shop that has these taps and the proper machine to tap out the tie rod and the Drag link.
For the Jam Nuts I had these made at the same machine shop that threaded bars.
Important Disclaimer:
This information is a personal account of modifications done by me and is not necessarily endorsed or encouraged for any other application. As with any suspension or steering modification the handling and safety of the Jeep is affected. In some circumstances this may be dangerous. We are only providing commentary and opinion based on our experience, your experiences could be significantly different. RedJeepClub.com and RedJeep.com cannot predict how any given modification will be used or what it will be subjected to. We do not recommend or endorse this or any product for any specific or general application. Anybody attempting this or any other modification does so at their own risk, we do not assume any liability.
Accept no compromises in any part of a custom steering setup. It must be perfect, your life and the lives of those around you depend on it.
NOTE: My email address is shown here in the picture with my Jeepin Dog. I had to put it in a picture so I wouldn't get so much spam email.
If you have questions please email me.

 This shows the bar hitting the spring at full steering.


 NOTE: My email address is shown here in the picture with my Jeepin Dog. I had to put it in a picture so I wouldn't get so much spam email.
If you have questions please email me.
NOTE: My email address is shown here in the picture with my Jeepin Dog. I had to put it in a picture so I wouldn't get so much spam email.
If you have questions please email me.