
|
|
. |
Red Jeep Club's collection of Technical Jeep and 4x4 related articles
Who Needs a very nice heavy duty Tire Carrier? You do! The Daytona 500 MMIIThis Tire carrier was built while I watched the Daytona 500 Nascar race. It was a great race. Mark Martin came out of retirement and was going to win the Daytona 500 for the first time every. He has tried 24 times. Well he lead the last 25 laps of the race and in the 4th corner on the last lap , he got loose and lost to Kevin Harvick by about 3 feet. ARRRGGGG Mark you should have won buddy, thus I named this bumper tire carrier MMII Mark Martin II second place. The bumper and tire carrier use different pieces of DOM tubing to make a strong and really cool looking tire carrier.
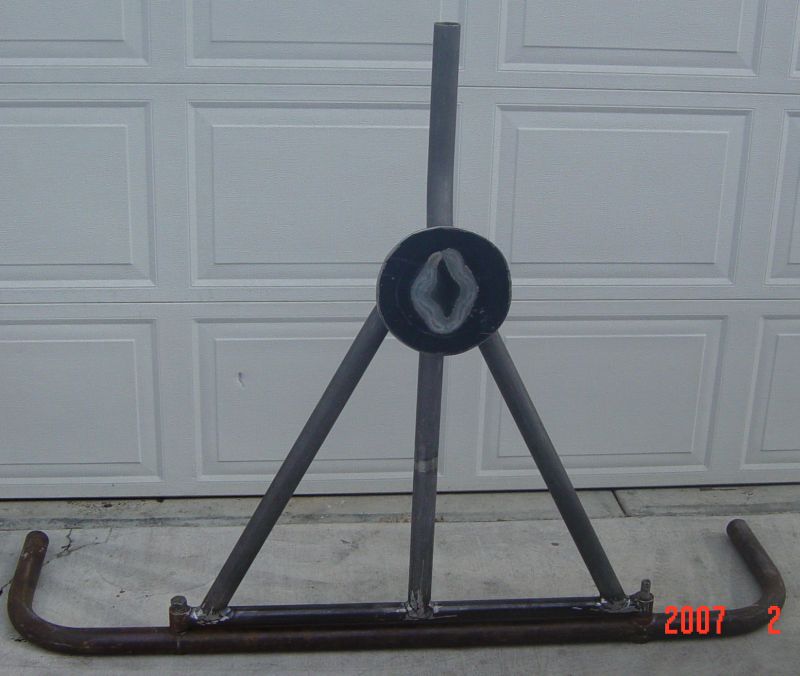
Here it is a shot from the front with it completed.
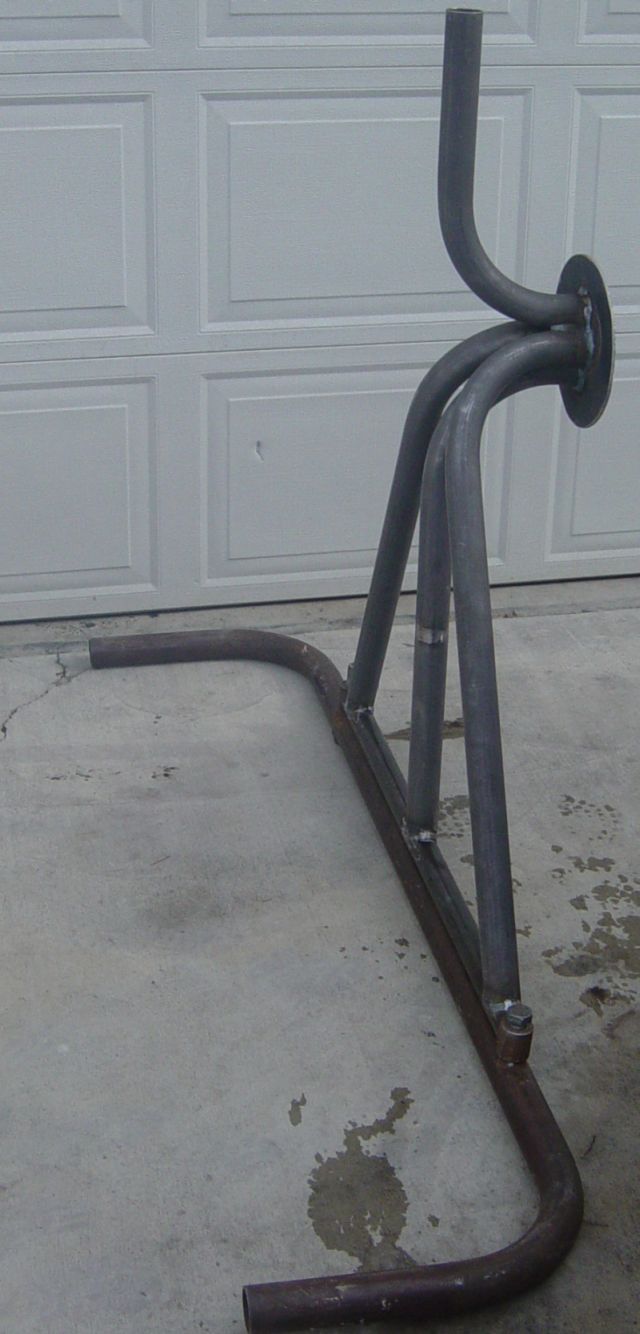
Side view with a bit of a rear view of the tubes and how they come together.
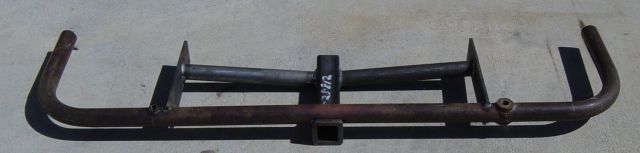
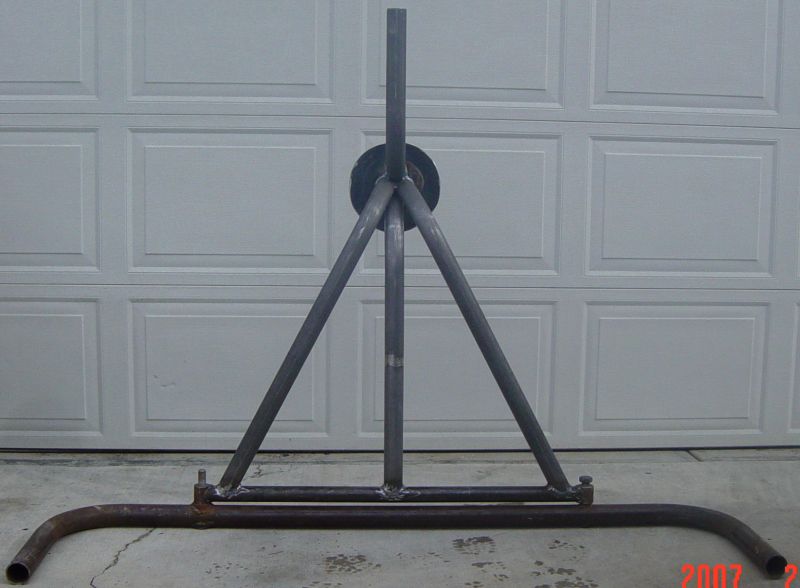
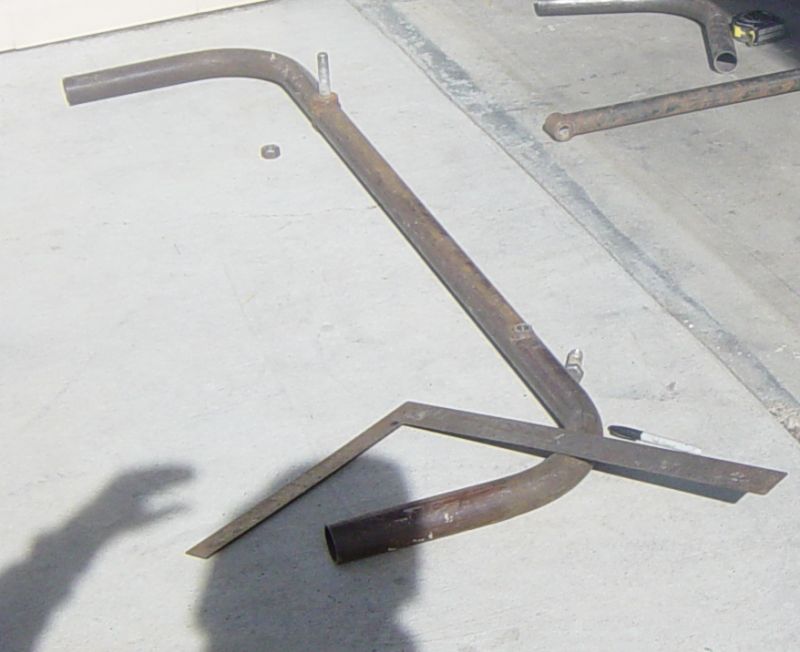
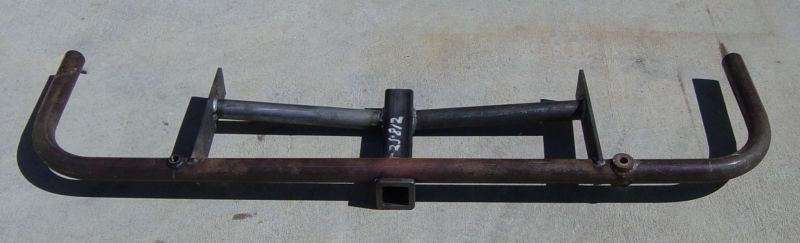
The backside, as it shows the tubes all meeting in the middle Now I will go into some of the details of Building this tire carrier.This Technical article address's a very important part of owning maintaining and upgrading your Jeep or 4x4 rig. We all run big heavy over sized tires. The basic fact is the stock tire carrier on every Jeep every manufactured is not up to the task. So I am going to show you how I built a heavy duty tire carrier out of the 1.75 inch DOM tube. I will go through it step by set and give you the sizes and dimensions of each part and each piece. This is the first tire carrier I decided to use round tube on. I usually use some form of 2 inch box square tube for a bumper and tire carrier. This one I went with round tube. Let's start by looking at a picture of the bumper we are starting with. This bumper was created by a friend for another friend. We are going to wrap this bumper around the rear frame of CJ8 scrambler that we are rebuilding. But that is another article. So let's examine this pictures and see that is already has a 2 bolts mounted into it to hold that tire carrier. I also got the top tube that mounts between the bolts to hold the tire carrier. The bumper is 2 inch DOM tube and the bar that sits on top of the bumper and is the base for the tire carrier is 1.5 inch DOM. This bar is 37.5 inches long from end to end. In the picture this bar is the long bar on the right by the tape measure. When you take a close look at this picture you can see a little Duck in the lower left. He is my little helper.
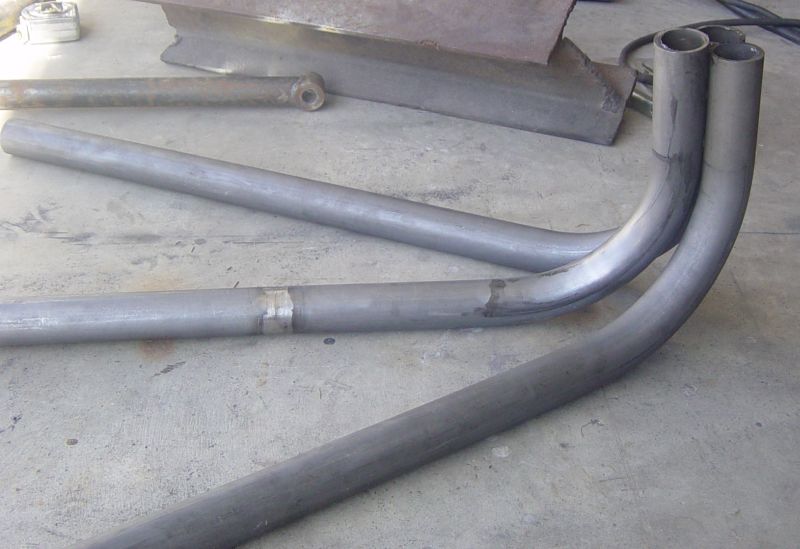
The design I am using is show here. These 3 tubes are the main supports for the tire. The two outer tubes were built using a piece of DOM 39 inches long. I put them in the bender at the very end, so the bend is as short as the bender will allow. I then bent them to 90 degrees. After the bend they are about 11 inches high from the floor. The requirement I have is to make the plate that hold the tire at least 5-6 inches from the tube. So the way these are sitting I will have plenty of clearance for the plate. I have at least 8 inches from the end of the tubes to the face of the 3 tubes. The middle tube does not need be that long. I used two short pieces that I had laying around and welded them together, this is why you can see the joint in the middle of the center tube. The middle tube was 34.5 inches long so I would recommend a piece about 36 inches long. As always you should make the parts too long then cut them off once they are welded together. If you really look closely you can see that these 4 tubes are not exactly the same length. I will bee trimming all of them before mounting the center section plate. The wide of the triangle at the base is 32.5 inches. The 3 bent bars are welded so that the center of the 2 middle tubes is 28 inches from the top of the bar that forms the base of the tire carrier. Here are a couple of the other secret drawing we were thinking about for this project.
This picture show the 4 pieces together. What is that top piece for. It looks weird, but it is for a removable rack. It uses the same bent tube and will go up and around the tire. We are going to get a piece of 1.5 inch tube and mount it to the rack. the 1.5 inch tube will then slide right into the 1.75 inch DOM. This is make a strong mount and we will put a pin like a trailer hitch pin through that 2 tubes once the are slid together. This is a slick way to have an easily removable rack. When the rack is on on the tire carrier the upper tube won't stick up too far and wont be in the way. This mask is also a good place to mount a radio antenna, for either HAM or CB.
Here is the final plate, I will mount it to the uprights and then later we can cut out the holes for the bolts that will hold the tire on. The diameter of this circle is 8.75 inches. It will hold the big tire without any problems. Another thing to consider when building a tire carrier is the weight of the vehicle you are mounting it to. If possible make the bumper and tire carrier super extra mondo strong. At one point in your jeeping and off road life you will put the weight of the vehicle on the tire carrier. It may be trying to go up bump dump and the Jeep rocks back and the tire carrier saves you from rolling over backwards, or you may end up between a rock and a hard place. I know I have don't both with my Jeep. each time the my tire carrier saved men. One time the whole carrier bent and presses up again my body leaving a nice little dent, the other time I bent it so bad that I have to replace the bolt that keeps it closed. But at least I was spared a ton of extra damage.
Well tell me what you think? I think it's cool design and I think it will work very well for this project.
|
||||||||||||||||


 NOTE: My email address is shown here in the picture with my Jeepin Dog. I had to put it in a picture so I wouldn't get so much spam email.
If you have questions please email me.
NOTE: My email address is shown here in the picture with my Jeepin Dog. I had to put it in a picture so I wouldn't get so much spam email.
If you have questions please email me.