
|
|
. |
Red Jeep Club's collection of Technical Jeep and 4x4 related articles
My Off Road Jeeping Trailer Part 5Off Road Trailer Build Page 1, Page 2, Page 3, Page 4 Page 5 Page 6 Page 7 Page 8 Page 9 Page 10 Page 11 Page 12 Page 13 Page 14 Page 15 Page 16 I have the Axle and it is place mostly. The front spring mount is built and welded into place. I have also fully boxed it just like the frame on a Ford Truck. Hahahaha. I have put the trailer "Together" many times now as I get just a bit further along with each day I get to sneak out and spend a few hours on this Super cool 4x4 trailer. I can't wait to get it rolling and really start to work out the kinks.
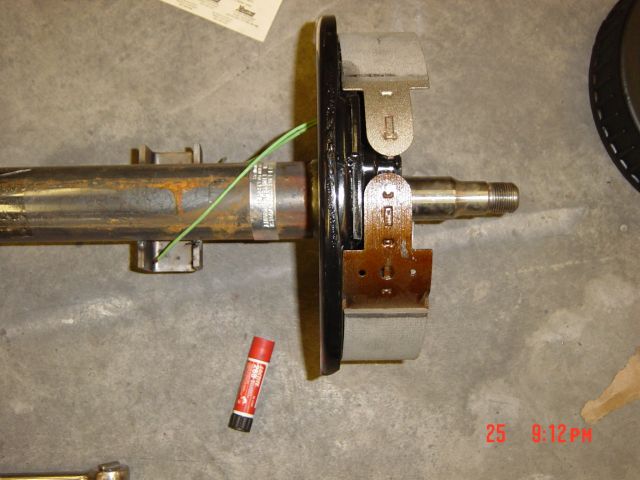
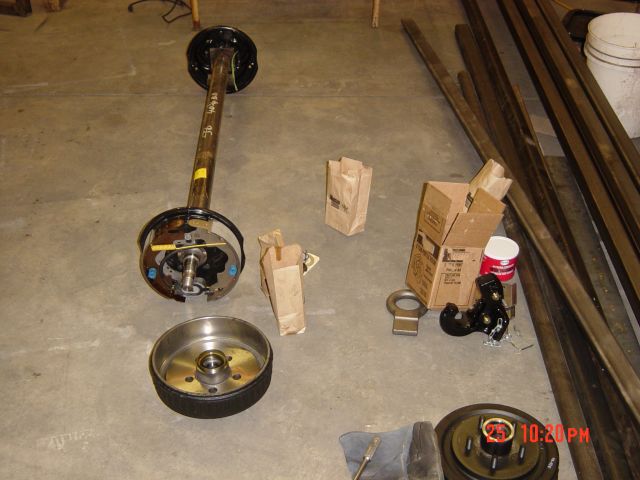
Let's start with the new Axle. I bought a 3500 pound Trailer Axle. This is a super heavy duty trailer Axle. I bought this versus a 2000 pound trailer axle because it was only about 10 dollars more and it will put up with the 4+ trails I plan to drag this trailer over. To assemble the axle I had to put each end on. This is the driver side, and as you can see I went the extra cost and added Electric Brakes to the mix. I want to be able to stop the trailer from the cab of My jeep if I am going down a steep water fall.
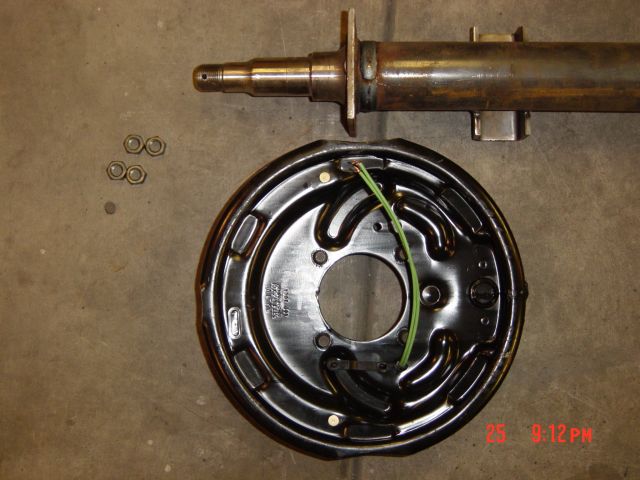
This is a shot of the passenger side. To assemble the axle I just needed to figure out up and down on the Axle and right and left on the hubs then this goes on with 4 bolts mounted in the hub and these 4 nuts sitting on the ground here. I used some red locktite as shown in the picture above. I have some of the solid locktite that is like lip stick, just smear it on and tighten up the nuts.
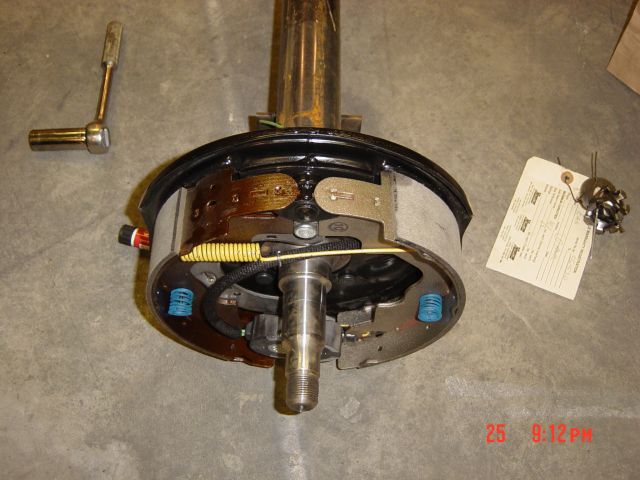
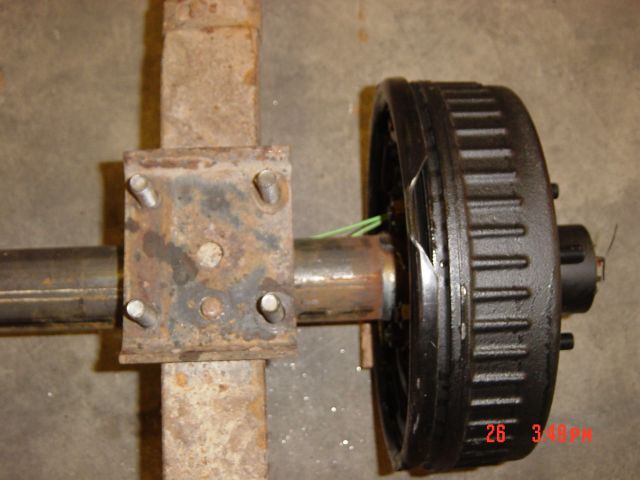
This shows a side view of the hub with the brakes. The Brakes are like the good old shoe brakes on every car built before 1990. The actuator is an electro magnet that is at the bottom of the assembly. When you apply electricity the magnet turns on and the magnet sticks to the turning hub with pulls open the brake shoes and the hub stops turning. One point the axle salesman made was to make sure I have a really good ground for the brake wiring.
Here we are with an axle ready for the messy part which is greasing the bearing and the hubs. As you can see I doing a spring under axle mount.
Ready set get Greasy. To pack the bearings you must just fill up you hands and cram grease into every possible little section of the bearings. Then apply as must as you can to everything else the race, the hub, the cats, you name it. Nobody is safe once the grease comes out.
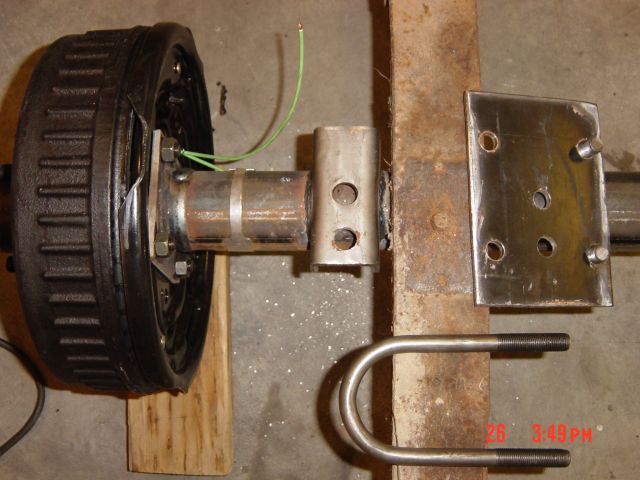
Now I have the axle completely together I am going to mount it to the springs. Here is a nice XJ Axle plate. But I moved the axle back on the plate an additional 1.5 inches. I drilled a hole in the plate and the mount on the Axle. I needed to do this so the axle would be far enough to the rear of the trailer to prevent wiggling and swaying when towing. I still wanted the shackle reversal, like you do ont he front of a CJ or YJ. Put the solid mount for the shackle up front and the flexible shackle in the rear.
This shows the hole I drilled in the Axle spring mount and the fancy new plate I had to build for the passenger side of this trailer. I didn't have two axle plates. If you study this picture for a second you can see the bolt in the spring will fit in the two new holes I drilled in the plates. Do worry I was also able to acquire an authentic XJ plate for this custom cool one was removed. Like I have said earlier, I like doing things twice.
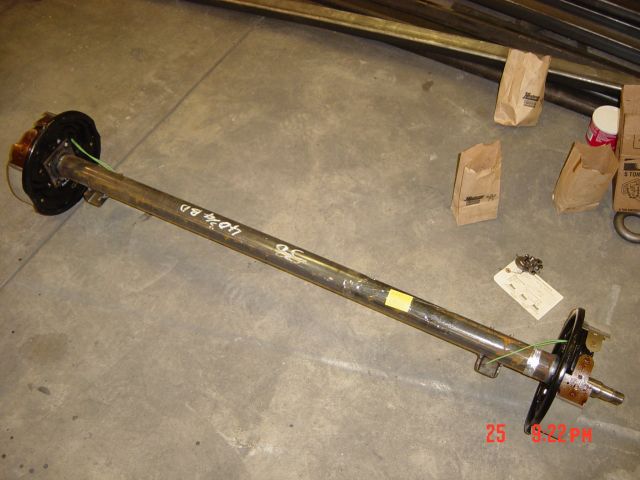
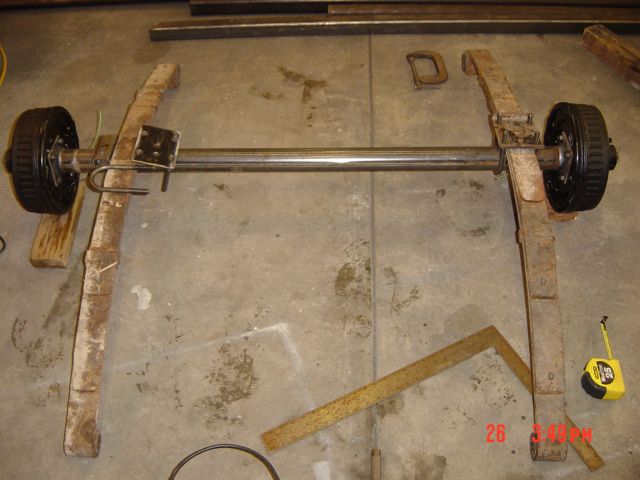
Now we are getting some place I have the almost complete assembly set out here on the floor. U bolt and plates and mounts are all setup. I put this all together but only made the bolts finger tight so I can line everything up as I mount it to the trailer frame. Someone please remind me later to tighten everything up. My axle is 58 inches wide from tire mounting surface to mounting surface. I made sure I had the measurements correct. I did spend the extra money to get an axle with Electric Brakes. I will need to figure out something for a parking brake. I think the 3500 pound Axle with a width of 58 inches from mounting surface to Mounting surface is going to do the trick just fine. This is 2 inches narrower than then Axle on the Rear on the Jeep Wrangler TJ which is 60 inches from surface to surface.
Off Road Trailer Build Page 1, Page 2, Page 3, Page 4 Page 5 Page 6 Page 7 Page 8 Page 9 Page 10 Page 11 Page 12 Page 13 Page 14 Page 14 Page 16
|
||||||||||||||||
 NOTE: My email address is shown here in the picture with my Jeepin Dog. I had to put it in a picture so I wouldn't get so much spam email.
If you have questions please email me.
NOTE: My email address is shown here in the picture with my Jeepin Dog. I had to put it in a picture so I wouldn't get so much spam email.
If you have questions please email me.